How I Made this Site
03 Jun 2023
This is the first post I’ve made since I moved my portfolio and blog over to ktcg.art, so I thought it would be fun to make a post about that entire process. It’s a litte outside the tech art scope of my site. But, I can imagine other artist-developers being curious about how they can make a site like this themselves. This site is hosted on GitHub pages and built by Jekyll.
I won’t go into tutorial-level detail about how to do everything. The idea of this post is to give someone new to web-development a holistic picture of how they could put a site like mine together.
Should I Do It?: Building a site yourself (instead of using a drag-and-drop website builder like SquareSpace) is a pretty big project. It’s not super hard but it is time-consuming, especially if you’re new to web-development. I wouldn’t recommend it unless you have good reasons. Here were mine, in order of importance:
- My old setup was an Adobe Portfolio site and a Wordpress blog that linked back-and-forth to each other. It was clunky and not-visually unified. I needed to consolodate those two sites. Which brings me to my next reason…
- I need my site to serve as both a blog and portfolio. Drag-and-drop builders tend not to have very elegant ways to display both blog-post content (usually a feed) and project-based content (usually a grid).
- I felt a custom site with a unique look is nice to have for somebody who is going for a “creative-coder” niche (like myself). I certainly don’t think the site will get me any jobs on its own, but in my opininon the site itself contributes to my portfolio.
- I was sick of paying for my Adobe Creative Cloud account just to keep Adobe Portfolio
- I was sick of paying Wordpress to keep ‘Doctors Swear By This One Weird Trick’ ads off my blog.
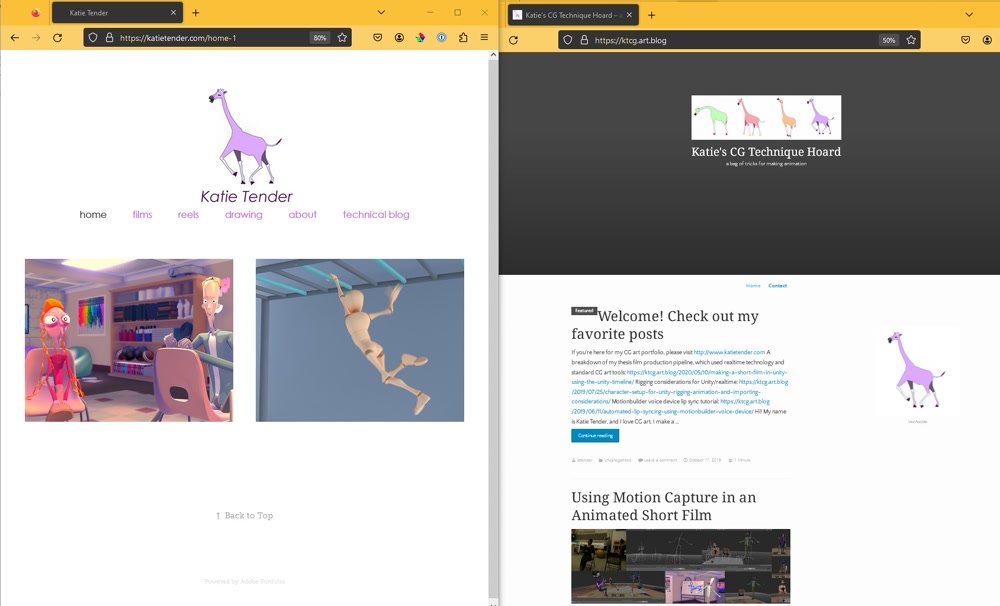
My old sites side-by-side. As you can see, it's clunky.
Time-Frame: The project took me five months, from buying the domain name to having a site that I felt comfortable showing off. During these 5 months, I worked on it for ~10 hours a week. I had barely touched HTML and CSS before starting this project, which definately contributed to the time commitment.
I already knew Git, which you need for this process. So, keep in mind that if you’ve never used it, it’ll slow you down initially. That said, the way to learn Git is to just go use it on a project. I think this would’ve be a great project to learn Git on.
Domain Registry: You get your domain name through a domain registrar. Examples include GoDaddy, NameCheap, etc. I used Gandi, because it was recommended to me. A lot of domain registrars will also host your site and have a drag-and-drop site-builder. You decide on your domain name and if it’s available, you buy it. Different top-level domains (.com, .net, .org, .edu, .ru, etc) have different connotations, so explore around. Keep in mind that some TLDs are common with spam sites, which can contribute to your site being deprioritised in rankings.
I know
One you have your domain name, forget about it until the end of the post. You can wait to do this step until the very end, but it’s the most fun one, so do it first! Plus, once you have the domain name, it incentivizes you to actually make the site.
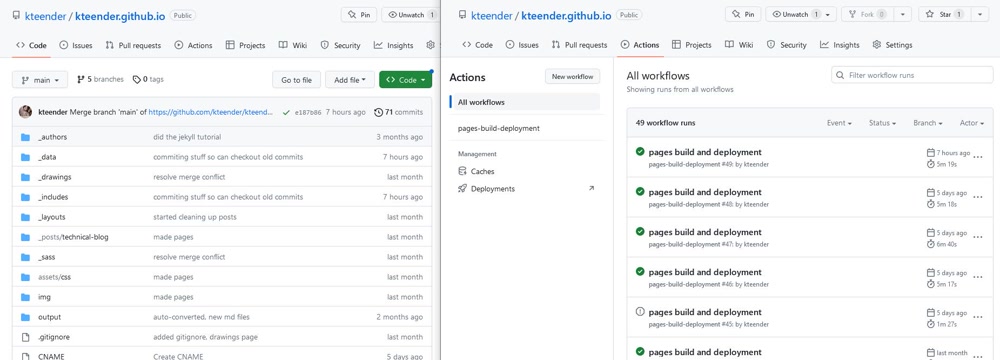
Set Up GitHub Pages and Jekyll: Jekyll is a static site generator. As the GitHub Pages docs explain, Jekyll has built-in support for GitHub pages, which means that if you host your Jekyll site from GitHub Pages, it’s really easy to build the site out of your markdown, html, and css files. Your site is going to be a special git repository that holds all your content. GitHub Pages will automatically use Jekyll to build the site from that content, and then host it.

Screenshots of my repository's code, which has the site content, and Actions, where you can see how GitHub automatically built the site after each push
For non-git users, think of a “repository” like a project folder. You’re going to need to learn a little git for this project. Most people use git in the terminal. If you’re really uncomfortable in the terminal, you can use the GitHub Desktop app. But give the terminal a try, even if you’re intimidated – it’s not that bad! There are a lot of great resources for learning git out there. I recommend the Atlassian docs.
The GitHub Pages and Jekyll docs are fantastic. Start with this GitHub Pages walkthrough. After that, read this page that gives context specifically about using Jekyll to build the site, and this one that gives instructions on setting up a Jekyll site within your repository. Then, once you have a Jekyll site building locally, follow the Jekyll step-by-step tutorial to get an idea of your toolbox. I also like this post by Josef Strzibny that covers the basics of Jekyll – I wish I had found it before I did this project!
After that, you can pretty much ignore the Jekyll/GitHub Pages aspect of the project until later. For now, you just need the frame of reference of how a Jekyll site kinda works. You technically don’t need to do this step until you’re done with your Mockup, but I think it’s helpful to have an idea of the tools Jekyll provides as you work.
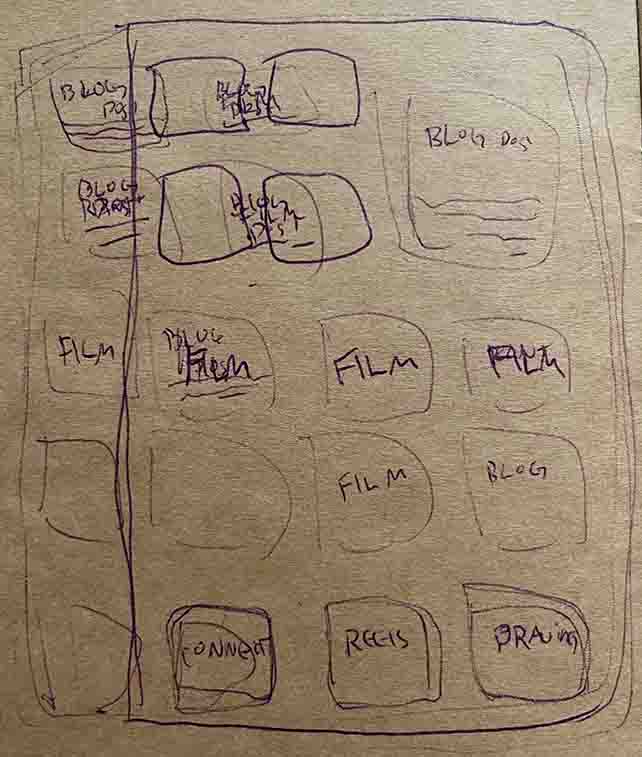
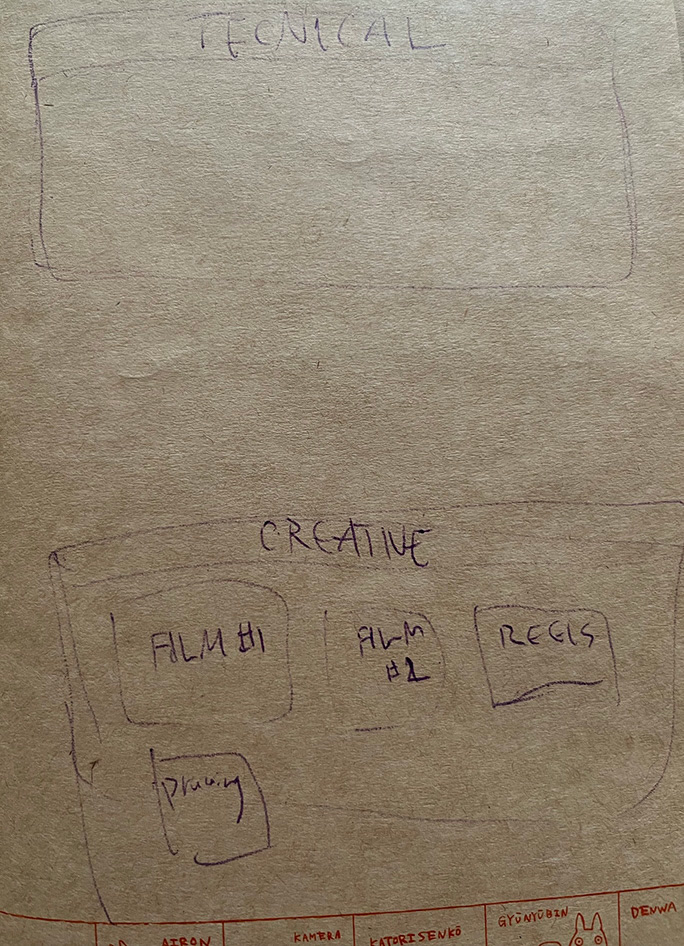
Mapping Out: I explored around looking for sites that I found inspiring. I would google “cool art blogs”, “cool tech blogs”, and “cool music blogs” to find examples. I probably looked through 150 sites in this step. I then sketched out a couple idea of how the site might present my content. As you can see, I ultimately went with a combination of the last two:
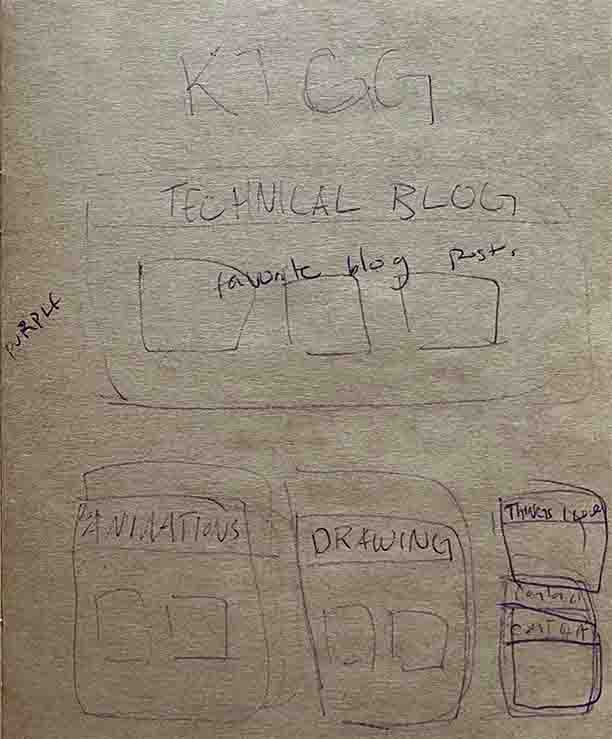
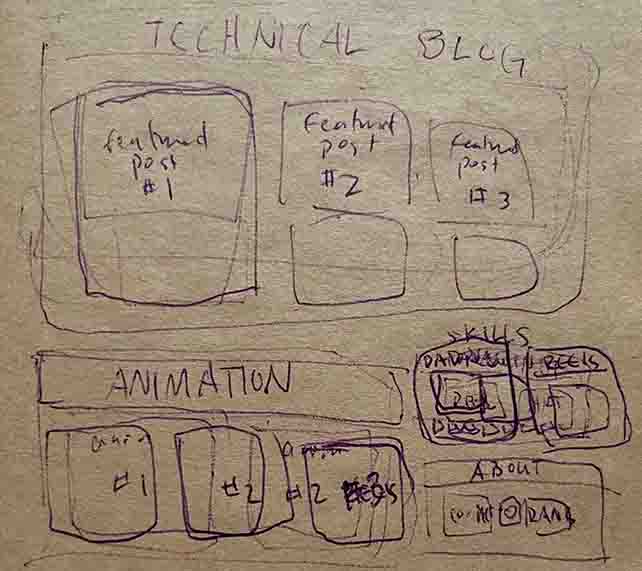
Mockup: This is the single step that takes the most time. I used HTML and CSS to mock up the most complicated page of the site, which was the index page. Again, at this step, I didn’t worry about getting the contents of the site ‘plugged-in’ to the Jekyll folder setup that was sitting in my site’s repository. In fact, I worked on the mockup in a different directory.
HTML and CSS are grind-y to learn, so try not to get discouraged. The concepts are simple, but there’s lots of rules. I recommend Googling constantly, inspecting the source on websites with features you like, and copying code from W3 Schools.
Here’s what my mockup looked like at various stages:
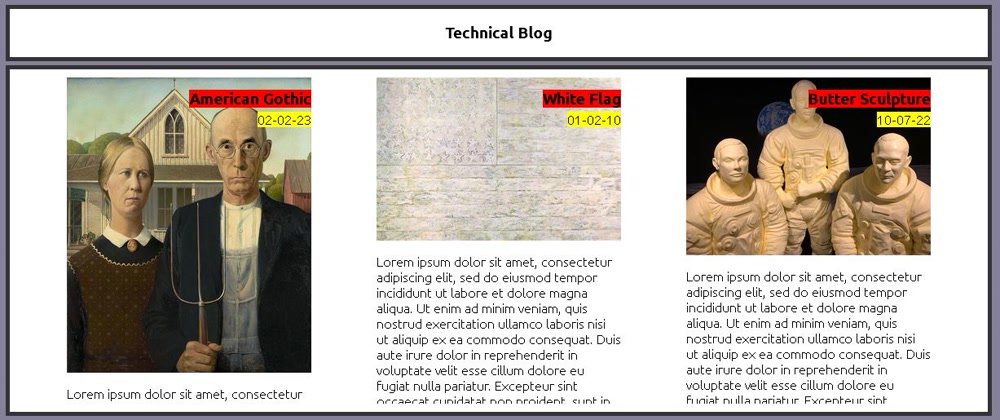
Figuring out how to display posts and learning CSS

Finishing the blog section
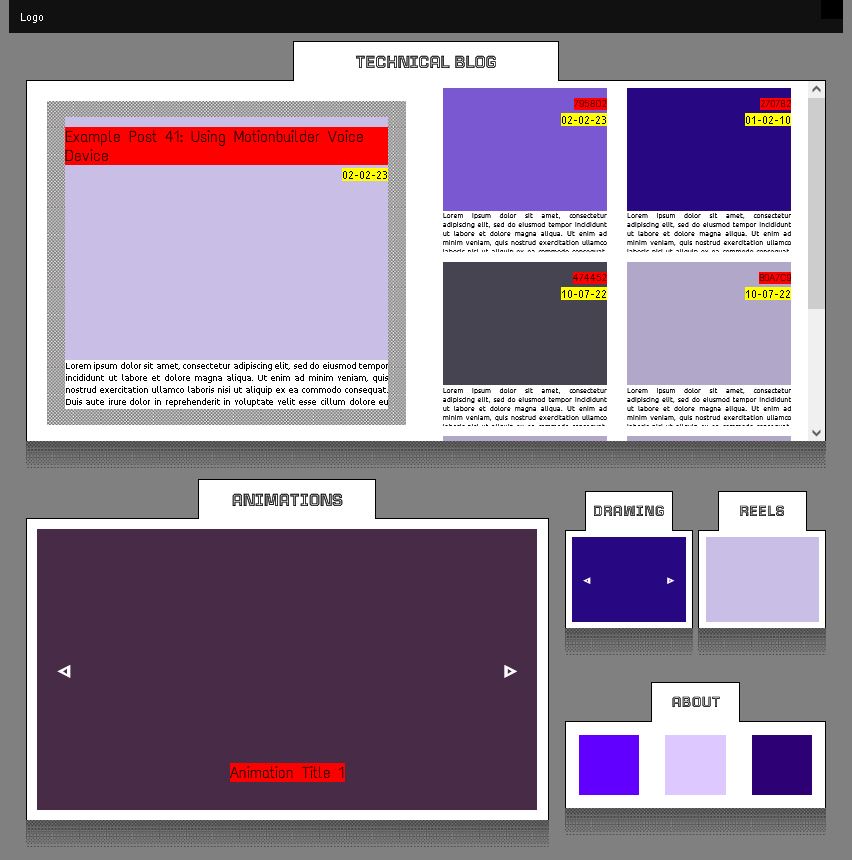
Figuring out how I was going to represent other types of content. This was the final state of the mockup
Update Feb 2024: I’ve since reorganized my home page, as you may have noticed. I mainly switched the two main sections and got rid of the reels section. It was pretty painless
Port Wordpress Blog Over: You don’t need to do this unless you have an exisiting Wordpress blog you’re trying to move over. There’s a number of tools out there that take your Wordpress site and attempts to convert them into the Jekyll folder structure. I used this one. There also appears to be an extension you can install on your Wordpress site itself. Keep in mind that you may still have to fix some image links. I wrote a few Python scripts to deal with this.
Set Up Your Content So Jekyll Can Build It: This step also takes a while. Once you have your mockup done, and all your site content gathered, it’s time to start getting it set up into Jekyll. Remember, Jekyll relies on your content (images, css, html, markdown, etc.) being in particular directories, front matter on markdown or html file to give information about how to build them, and .yaml files to give site-wide information that you can access with Liquid expressions.
Below, I’ll give some scattershot examples of how I use different features of Jekyll for my site. If it took you a long time to make your mockup, I recommend you review the Jekyll step-by-step tutorial to jog your memory about the various features
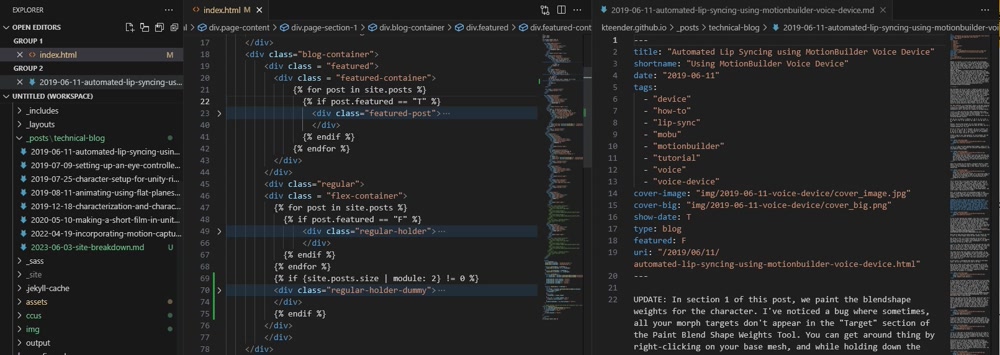
Front Matter: Here's an example of how I used the front matter in each post. The white text in my index.html page is Liquid code. The post.[x] expression is accessing the front matter of the posts -- specifically in this example, post.featured is acessing the featured property of the markdown post on the left.
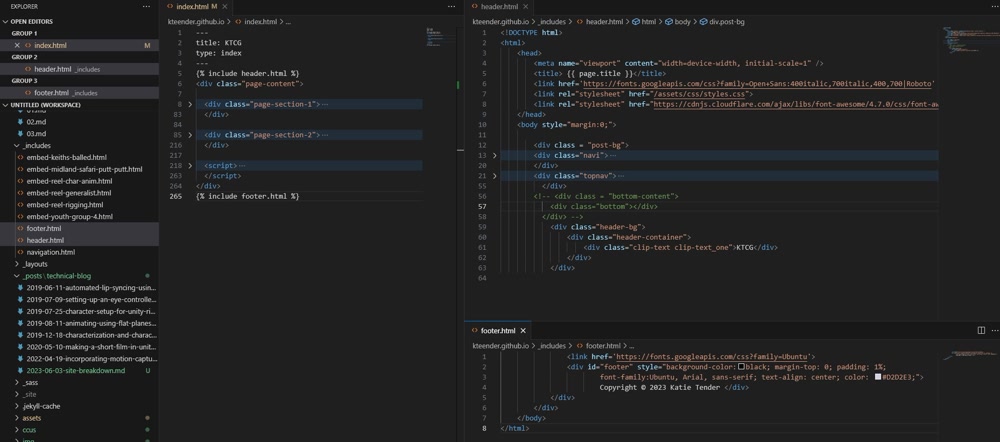
Includes: You can put html files in your _includes folder and then include them in other html files (including your layouts). When Jekyll builds the site, it will replace that Liquid include statement with whatever is in the included file to generate the html for the actual page. This is how I put in the navigation and copyright for each page, as well as declared the Doctype and put in the head hml.
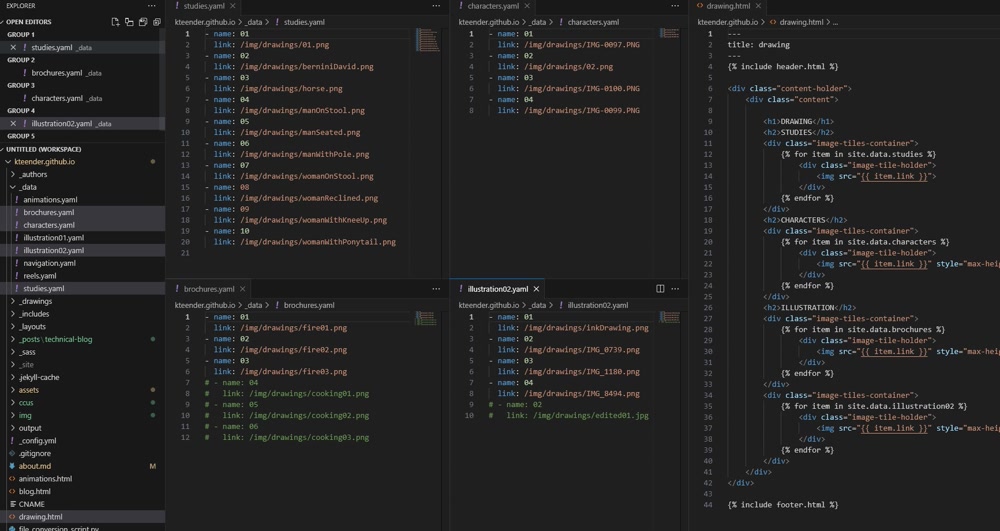
Data: You can put whatever site-wide data you want into a .yaml file and toss it into the _data folder. This is how I created my drawings page -- I put links to the images in my /img folder in various .yaml files seperated by drawing "type", then used Liquid to loop through those files within the actual drawings.html page. When Jekyll actually builds the page, it'll build an html page where each of those drawings has its own div.

Assets: This is more niche, but I just wanted to point out where to put your css assets so that Jekyll can find them. I didn't use the SASS stuff that the Jekyll step-by-step walkthrough talks about.
There are lots of repos of Jekyll sites around so you can take a peek at how the pieces fit together. Feel free to poke around mine.
As you know, when you commit as push changes, GitHub will try to use Jekyll to build your site. If it can build without errors, it’ll host it on [your_user_name.github.io]
Configure Your Custom Domain: Once your site is shippable, you set up your domain to point to your GitHub Pages site. You set the custom domain for your sites GitHub repo, then add DNS records through your domain registrar. Follow the GitHub Pages tutorial on this step. That page contains two fairly similar tutorials, one for configuring a subdomain and one for configuring an apex domain. I did the apex domain tutorial, since I didn’t want to have to use a “www” subdomain for my site. Another caveat is that this tutorial makes use of the dig command, of which there are no free Windows builds. I use the Windows Subsystem for Linux for all my development projects, which is how I was able to use the command. You might be able to get away with not using the command, since it’s only needed for a verification step. I still recommend checking out WSL though, if you’re on Windows.
DNS changes can take up to a day to propograte.
Wrap-Up: That’s it! There’s always improvements I could make to the site. At the time of this post, I still need to get Google Analytics set up, some of my images take a long time to load, I’m not in love with how the text gets cut off on the post previews, etc. But I’m calling it shippable!